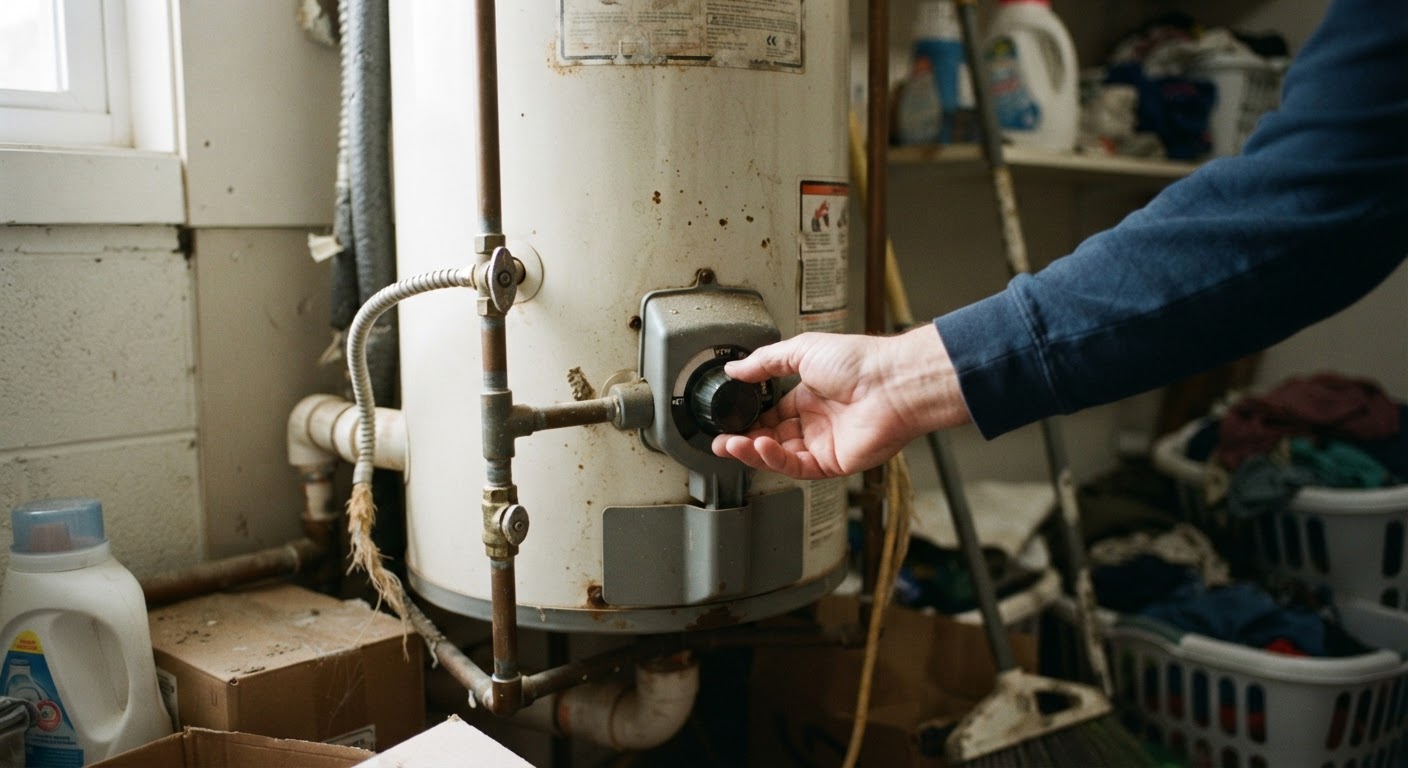
Why factory-set water heater temperatures run hotter than necessary
Most water heaters come out of the factory set to 140 degrees Fahrenheit. That number isn’t chosen because your household needs water that hot. It’s chosen because it’s a safe default for a machine that will end up in all kinds of homes, with all kinds of pipe lengths, tank sizes, and usage patterns. Manufacturers would rather set it too hot than have someone complain their shower runs lukewarm after a long pipe run in a big house. It’s a conservative, one-size-fits-all number, and it lands on the high side for almost everyone.
The catch is that once your water heater is installed, most people never touch that dial again. It gets set once, at install, and then forgotten for years, sometimes for the life of the unit. Nobody walks you through adjusting it, so it just sits there, quietly heating water hotter than you actually use, day after day, whether you’re home or not.
That constant overheating costs money in a way that’s easy to miss because it doesn’t show up as one big line item. It’s baked into your regular utility bill, a little extra every single day, which adds up to real money over a year without ever announcing itself. Turning the temperature down is one of those rare fixes that costs nothing, takes a few minutes, and keeps paying you back every month after.
The sweet spot temperature that balances comfort, safety, and lower bills
For most households, 120 degrees Fahrenheit is the number worth aiming for. It’s hot enough for comfortable showers, hot enough to properly wash dishes and laundry, and cool enough that you’re not paying to heat water beyond what you’ll actually use before it cools back down anyway.
There’s also a safety upside. Water at 140 degrees can cause a serious burn in a few seconds of contact. At 120 degrees, that same contact takes considerably longer to cause harm. If you have young kids who might turn a faucet the wrong way, or older adults in the house with slower reflexes, that difference matters. It’s one of those changes where the safer choice and the cheaper choice happen to be the same choice.
If you have an older dishwasher without its own internal heating booster, or someone in the household who insists on very hot baths, you can split the difference and go with 125 or 130 instead of dropping all the way to 120. You’ll still save something, just not quite as much. The point isn’t to hit an exact number, it’s to move off that factory-default 140 and land somewhere your household is comfortable with, since even a small drop starts paying off immediately.
How much a few degrees actually saves over a year, with real numbers
Here’s the rough math, and it holds up whether you’re on gas or electric, though the exact dollar amount will depend on your local utility rates and how big your tank is.
Water heating typically makes up a meaningful chunk of a household’s total energy use, often cited as somewhere around the range of a sixth to a fifth of the average utility bill, depending on the home. Within that chunk, every 10-degree reduction in your water heater’s set temperature tends to translate into a savings of roughly 3 to 5 percent on the energy used specifically for water heating. That’s not the same as 3 to 5 percent off your whole bill, but it’s a real, steady reduction on a cost that runs every single day of the year, not just in summer or winter.
So if you drop your water heater from 140 down to 120, that’s a 20-degree change, which lands you in the range of a 6 to 10 percent cut in your water heating costs. Put that against a typical monthly utility bill, and depending on your household size and rates, that can work out to a noticeable amount taken off your bill every month, all year, just from adjusting a dial you probably haven’t touched since move-in.
The other savings that’s easy to overlook: a cooler tank loses less heat to the surrounding room while it’s just sitting there between uses, which is called standby heat loss. Your water heater is running most of the day even when nobody’s using hot water, just to keep that tank at temperature. The lower you set it, the less energy it burns doing nothing but idling. Over a year, that idle-time savings adds up right alongside the savings from using less-hot water directly.
None of this requires buying anything or changing your habits. It’s the same showers, same dishwasher loads, same laundry, just run off water that isn’t heated hotter than any of it actually calls for.
Safe step-by-step instructions for adjusting a gas or electric water heater
Before you touch anything, find your water heater. It’s usually in a basement, garage, closet, or utility room. Take a look and figure out whether it’s gas or electric, since the adjustment process is a little different for each.
If you have a gas water heater
Most gas units have a dial or knob right on the front of the tank, often behind a small access panel, sometimes marked with a temperature gauge that has settings like “warm,” “hot,” and “very hot” instead of exact numbers. If yours has actual numbers, turn it down gradually, in small increments, rather than cranking it all the way in one move. Give it a day between adjustments, since the tank takes time to fully reflect a change. Run a sink faucet for a minute and check the temperature with a kitchen thermometer to see where you’ve actually landed, since the dial markings aren’t always precise. Keep adjusting in small steps until you’re reading close to 120 degrees at the tap.
If you have an electric water heater
Electric units usually have two thermostats, one for the upper heating element and one for the lower, tucked behind a couple of small panels on the side of the tank. This is the one place where you do want to be a bit careful: before opening those panels, switch off the breaker for the water heater at your electrical panel. You don’t need to be an electrician to do this safely, you just don’t want to be poking around near wiring while it’s live.
Once the power’s off, remove the access panels, you may find a layer of insulation behind them that you’ll gently move aside, and you’ll see the thermostat dial or screw underneath. Adjust both the upper and lower thermostats to the same temperature, since electric heaters work in stages and having them mismatched can cause uneven heating or unnecessary cycling. Put the insulation and panels back, restore power at the breaker, and wait several hours for the tank to fully adjust before testing the water temperature at a faucet with a kitchen thermometer.
A few general notes for either type
Always test with an actual thermometer rather than trusting the dial markings, since these gauges drift out of accuracy over the years and a “120” setting on an old dial doesn’t always mean 120 at the tap. Make the change in small steps rather than one big jump, especially if you’re not sure how sensitive your household is to a cooler shower. And give any change a day or two to fully settle in the tank before deciding whether you want to nudge it further.
Extra insulation tricks that let you turn it down even further
Once you’ve dialed back the temperature, there are a few more no-cost or low-cost moves that let a lower setting go even further, because they reduce how much heat your tank loses in the first place.
Wrap the tank itself in an insulating blanket if it doesn’t already have one built in. Newer water heaters often come with decent factory insulation, but older tanks, especially anything installed more than a decade ago, tend to lose heat faster than they need to. A tank blanket is inexpensive, takes about twenty minutes to install, and cuts down on the standby heat loss we talked about earlier, meaning the heater doesn’t have to work as hard just to hold its temperature between uses.
Insulate the first several feet of the hot water pipe coming out of the tank, and any exposed pipe running through an unheated space like a garage or crawl space. Foam pipe sleeves are cheap, slide right over the pipe, and keep the water hotter for longer as it travels from tank to faucet, which means less waiting around and less wasted hot water down the drain while you wait for it to warm up.
If your water heater sits in a cold garage or an uninsulated closet, consider whether there’s a simple way to add a bit of insulation to that space itself, like weatherstripping a door or sealing a draft. A tank that’s not constantly fighting a cold room around it holds its temperature more efficiently, which means it cycles on less often.
Finally, if you’ve got an older tank that seems to run through hot water faster than it should, or that seems to need to be set unusually high just to feel warm, that can sometimes be a sign of sediment buildup inside the tank affecting how efficiently it heats. Flushing a tank is a bigger task than the temperature adjustment, but it’s worth knowing about if you find yourself wanting to set the temperature lower but the hot water doesn’t seem to be lasting as long as you’d expect.
None of these extra steps are required to see savings, the temperature adjustment alone does most of the work. But if you’re the type who likes to squeeze a little more out of every change, insulation is the natural next step that lets a lower, safer, cheaper setting feel just as comfortable as the hotter one you started with.